
How to schedule Facebook posts with Sprout Social
Written by Mandy Patterson
Published on February 17, 2021
•Reading time 4 minutes

It’s fair to say content is still king with social media. In fact, without constantly engaging your audience with relevant content on networks like Facebook, you lose value, authority and effectiveness. Maintaining this constant stream can be daunting, but many social media managers learn how to schedule Facebook posts at a later time and date to help manage and automate the process. Your audience never sleeps and neither should your Facebook content stream.
Not only does scheduling Facebook posts help you manage your content distribution process, it also helps you keep your sanity.
Luckily, you can use Sprout Social to schedule Facebook posts so your audience sees the right content at the right time. There’s no need for multiple alarms and alert messages to plan your content–you can get a week’s, month’s or quarter’s amount of content scheduled quickly.
Want to get started right now? Easily schedule your Facebook posts with a free 30-day trial from Sprout Social.
How to schedule Facebook posts with Sprout Social
Scheduling Facebook posts at a specific time is essential for brands launching a product release, sending promotional content on a timely basis or for those wanting to target a specific audience. Making the most of your Facebook organic reach is one of the hardest things to achieve.
This is why scheduling Facebook posts is so important for brands increasing their social presence. No matter the size of your business, Sprout has the perfect tools to fit your needs, and more importantly, your budget.
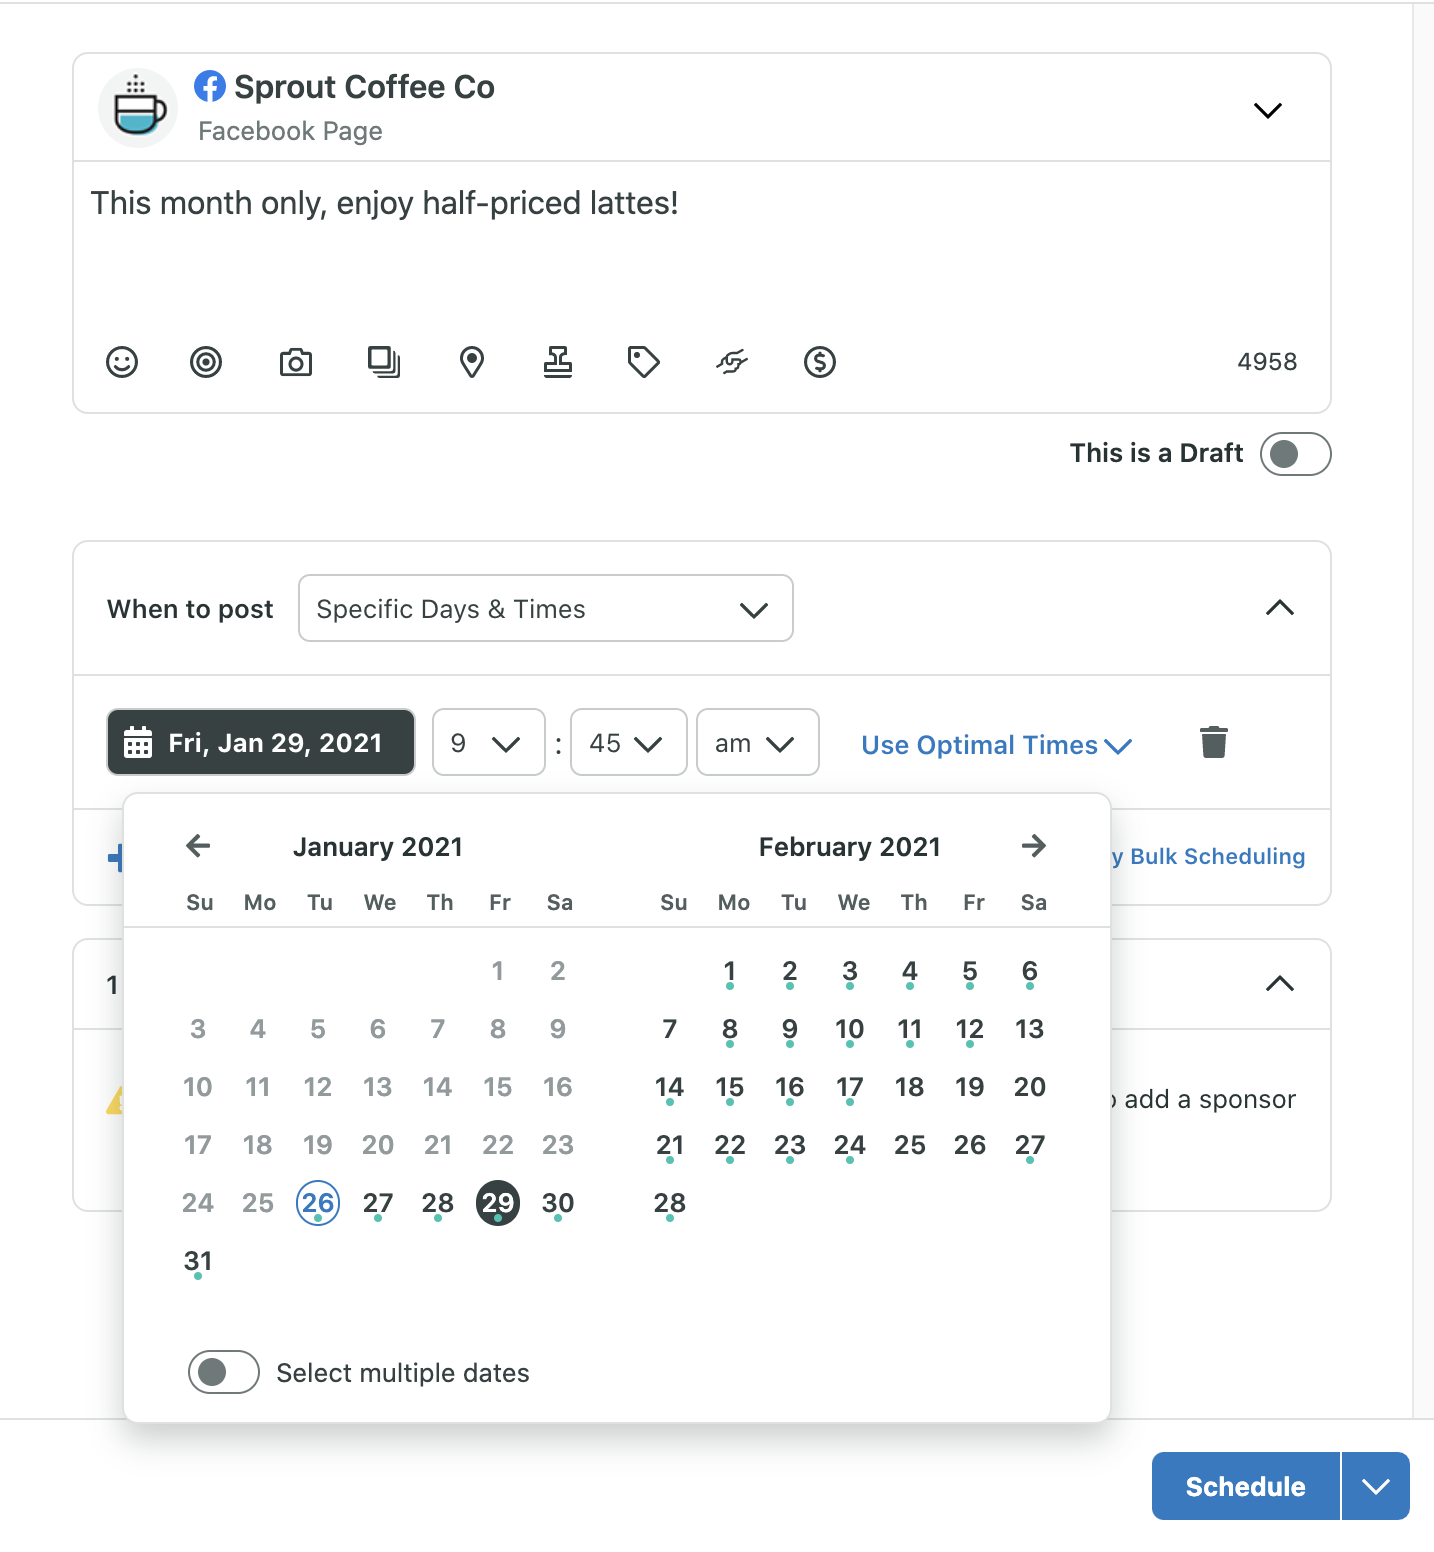
Here’s how to schedule Facebook posts with Sprout:
- Click the Compose icon to open the Compose window.
- Select the Facebook Pages you want to post to from the Profile Picker.
- Create your post.
- Select Specific Days & Times from the When to post dropdown.
- Select the date and times you want to post.
- Optionally add more scheduled times.
- Click Schedule.
Scheduling Facebook posts with the Sprout Queue
What do you do when you have meaningful Facebook content, but don’t need to publish at any specific date or time? Sprout still has you covered with the Sprout Queue.
You can build your Sprout Queue to fill engagement gaps throughout the day with content around product tips, links to thought leadership articles or industry news.
Choose the number of posts per day, your date and times and Sprout will do the rest. To get your Sprout Queue setup, follow these steps:
- Navigate to the Publishing tab.
- Click Sprout Queue.
- Click Compose and create your post.
- Choose Auto-schedule with Sprout Queue from the When to post dropdown.
- Select Queue Next at the first possible time slot or Queue Last to move the post to the end of the queue.
- Click Queue or Submit for Approval to schedule your content.

Configuring your queue timeline
So what does this do to your content after it’s queued? Sprout’s suite of Publishing tools places the content in the Queue Timeline for you to choose a specific time or date. There you can identify your publishing time gaps and plan your content.
You can configure this feature to run during specific times or dates. This makes it simple for social media managers to post during optimal off hours when you have space to publish. Select various post times per Facebook Page.
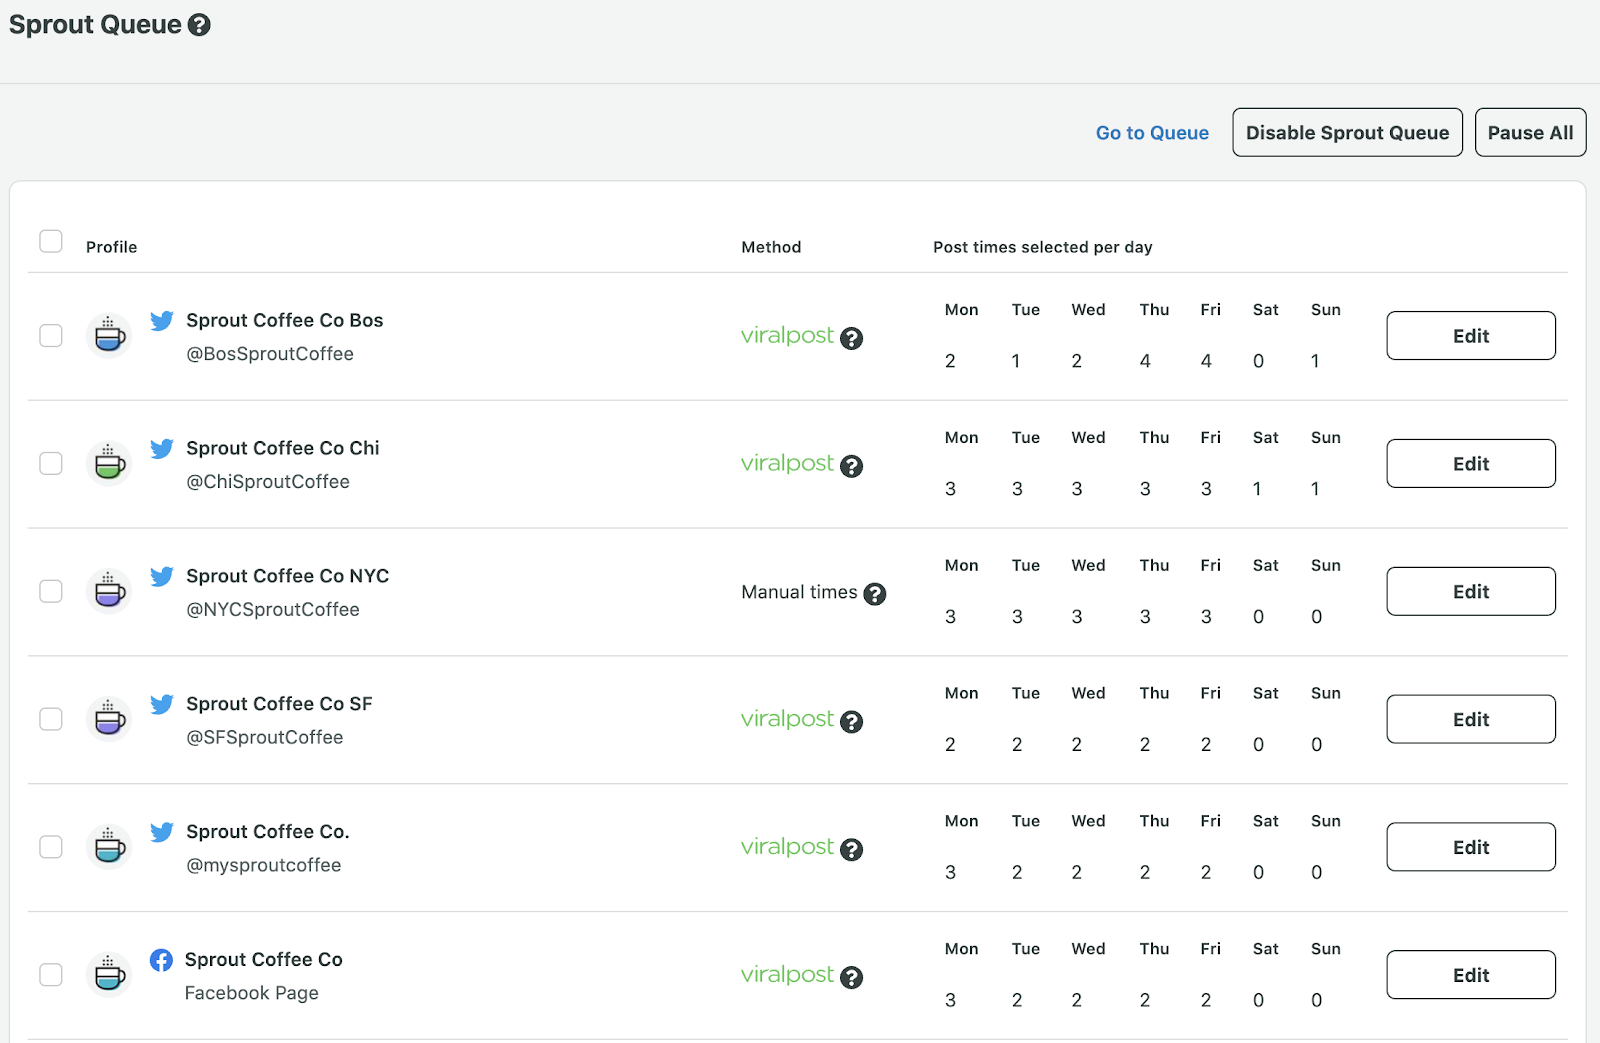
Sprout’s Queue even makes it simple to see your daily post times throughout all your different social media profiles.
Take advantage of ViralPost
ViralPost is Sprout’s secret weapon when it comes to publishing at the most optimal times. Configure ViralPost in your Sprout Queue to publish your queued content at optimal times for audience engagement (only available in Standard Plans and above).
When you use ViralPost, it takes out the guesswork of when to publish and learns the best times to connect your audience and spark engagement. This data-centric solution analyzes your audience’s usage and engagement patterns to determine the optimal times to deliver content for maximum impact.
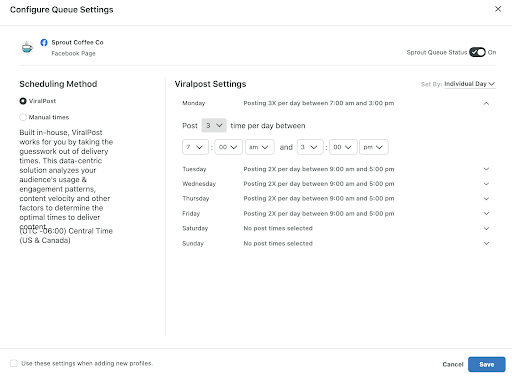
To configure your ViralPost settings, follow these steps:
- Navigate to your Publishing settings.
- Click Sprout Queue.
- Click Edit for the profile you want to configure ViralPost for. The Configure Queue Settings popup opens.
- Select ViralPost for the Scheduling Method.
- Choose whether you want to set your schedule by Individual Day or Weekdays/Weekends.
- Select the number of times you want to post for each day of the week.
- Select the time range you want to post between.
- Click Save.

Adding Facebook content to the Sprout Queue
It’s always best practice to queue content when it’s top of mind. Draft a message directly from Compose, share content you discover on the web with Sprout’s Chrome Extension or add content to the queue directly from the RSS Reader. Whichever type of content you wish to publish, our tools will suit your needs.
Pro Tip: Add content anytime, from anywhere by queueing content from Sprout Social’s web, mobile or browser extension apps.
Collaborate & Share Your Calendar
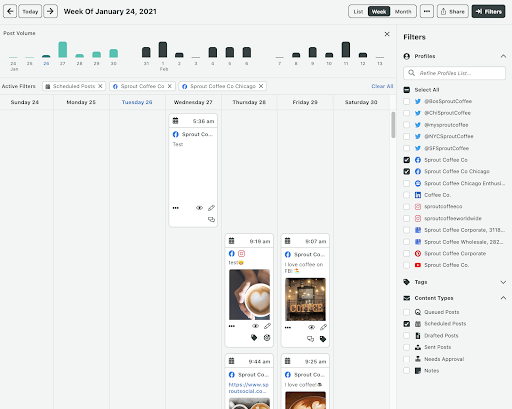
Last but not least, once you have your content in order, easily view, share and collaborate on your content calendar. Sprout’s Publishing Calendar gives you insight into your publishing schedule and more.
Here’s how to view and share your calendar as a PDF:
- Navigate to the Publishing tab.
- Click Calendar.
- Choose List, Week or Month.
- Select your Date Range, Profiles and Content Types.
- Click Share.
- Click Download PDF.
In closing
Sprout Social’s Publishing features make it easy to schedule content for Facebook and set your strategy apart from your competitors.
Want to try it out yourself? Sign up for a free 30-day trial and get started!
Recommended for you
View all Recommended for you- Categories
Facebook Creator Studio: The digital marketer’s guide
Published on July 26, 2022 Reading time 6 minutes - Categories
The best times to post on Facebook 2022
Published on July 6, 2022 Reading time 10 minutes - Categories
How to conduct a Facebook competitor analysis report
Published on June 23, 2022 Reading time 6 minutes - Categories
How to use Facebook Messenger: A guide for businesses
Published on May 23, 2022 Reading time 7 minutes